Tuesday, November 24, 2015

Small prebuilt coops - reality and work arounds

We've all seen them around, those cute little chicken coops.  A covered run, easy access they promise.  How nice it would be, just buy one and put it together.  This past spring, the lure of a small prebuilt coop proved too much for me.  I wanted a bantam coop to hold two or three bantams and did not want to spend the next month or two building it like I had my big coop.  I ended up buying a new coop, very cute, already assembled from the local equivalent of craig's list.  Here's what I learned:

 Preparation

  • The hardware on the prebuilt coop was not adequate.  While the nesting box had a lock, the doors didn't.  To prevent raccoons and other predators from gaining access, I added those, along with latches to keep the roof and droppings tray from being opened.  I like to use the catches from the leashes I bought from the dollar store.  They are cheap and easy to use.
  • More ventilation was needed.  It had one little screened window.  I used a drill and key hole saw to cut a hole in the other side of the coop and covered it with hardware cloth to provide more ventilation.
  • Updating the roosts. The roosts were lower than the egg boxes.  Moved one of the roosts up 12".
  • Restaining.  I performed the water bead test on the coop.  Put a drop of water on the coop.  If it soaks in, it isn't waterproof.  I bought some stain from a local hardware store and repainted it.
  • Adding additional run space.  The hens and chicks looked a little crowded, so I added some additional space by building an extension under the external egg box.  This gave them an extra 2 square feet of space.
Access

The coop I bought had four access points: a door to the run, a door to the coop, the lid to the external nesting box, and the roof that opened.  The roof that opened was not as useful as I had thought.  It was hard to reach the bottom of the coop.  There was only a single door to access the run.  This meant if a chicken went under the coop, there wasn't any good way to reach it.  I took out one of the hardware cloth panels under the coop and added another door.

Another thing I realized is to reach into the run required me to kneel down.  This meant I often ended up with little chicken presents on my pants since they like to hang out near the coop when free ranging.  This also meant while cleaning I was on my hands and knees.  I finally bought a pair of knee pads for gardening to help with this problem.

The small doors also made it difficult to access the run when wearing a heavy coat in fall and winter.  The coat kept getting me caught in the door way.


Dealing with food and water.  

Those pictures of happy chickens in these coops rarely show food or water.  I made a feeder out of 3" pvc pipe parts.  I didn't need to glue the pieces together, I just used duck tape.  I put it in the coop to keep it dry and used a wire and some eye screws to keep it from getting knocked over.

For water, I added chick nipple waterer I had purchased at the farm supply store.  


Summer turned to fall.  The temperatures started dropping below freezing.  The water started freezing.  Because I was going to need someone else to watch my chickens sometimes, the "carry out hot water" approach wasn't going to work.  

I tried two different solutions. I tried a heated dog dish.  The water didn't freeze, however, when I tried to get the bowl in or out of the coop, I often spilled it, which meant tons of wet bedding.  The second solution was a three gallon horizontal nipple waterer with a stock tank heater in it.  I was able to get it in and out without spilling, but it took up more room.

Cleaning
I did not find the slide out tray to be very useful.  The metal it was coated with made it very slippery for the chickens to walk on, so I added in pine shavings.  When I tried to get the tray out, the bedding tended to fall out into the run.  I discovered I had a small dust pan that fit right through the door, so I just used that to scoop out bedding when it needed to be changed.

The pop door
The pop door was a horizontal sliding one.  Bedding liked to get caught in the track and prevent it from closing.  I was often down on my knees picking pine shavings out of the track so the door could close completely. My plan was to put a paint stick across the doorway inside the coop to keep the bedding in.  I haven't gotten around to it.  This pop door also doesn't lock.  I decided since the run was locked, that was good enough.  I think something could be put through the push handle to lock it.


Weather

Something I quickly learned was the run was not as weather proof as I had hoped.  Because the run is only a little over two feet wide, rain and snow can blow the entire way across it.  In a light rain, it's ok and things stay reasonably dry, but add in a few gusts of wind and all the pine shavings in the run are soaked.  I found this out the hard way, culminating in me having to blow dry three shivering, snowy silkies.

Small coop as a brooder

I had two different bantams hatching eggs.  I put one in the nesting box and the other in a cardboard box in the run under the coop.  Having a broody in that nesting box was ideal.  I had easy access to her and later, her chicks.

The final transformation
With winter on us, I finally decided this small coop wasn't good for the snowy winters we get where I live.  It was great for a bantam hen and her chicks.  It was great as a grow out pen.  It did not work well as a permanent home.  I sold half my bantams and moved the rest into my other coop, until next year when I use this coop to hatch more chicks.




Sunday, August 23, 2015

More hatching...and chicken math

I have shipped silkie and frizzle eggs under a bantam cochin broody set to hatch August 28.  

This is actually a convoluted story involving chicken math.  I thought my cochin and my silkie were going broody at the same time.  I wanted to see if the cochin is a good broody because my silkie's only redeeming characteristic is her maternal instinct.  If the cochin was just as good, I could rehome the silkie and get a more congenial hen.  So I thought, I'll give the cochin some eggs and have the silkie as back up.  

I couldn't find any local eggs, so I ordered some from papa's poultry.  As soon as I ordered eggs and moved the cochin out of the coop, of course the silkie decided she wasn't broody anymore.  I put the shipped eggs under the cochin, but got nervous, "what if she quits on day 16 or something", so I bought a hovabator incubator.  

Then a week later, a fellow BYCer offered me some different silkie and frizzle eggs.  "What good is an empty incubator? I have to make sure it works,"  I thought, so I put some of those eggs in the incubator with two left over which I kept around.  Three days after the incubator eggs started, my silkie went broody, so I put the last eggs under her.  

I started with 9 shipped eggs under the cochin, 2 shipped eggs (a week old by this time) and 10 local eggs in the bator, and 2 eggs under the silkie. 

After candling, I have 6 shipped eggs under the cochin, 6 local eggs in the incubator, and 2 eggs under the silkie.  I have my fingers crossed that I will end up with a few chicks.

Wednesday, April 22, 2015

Broody Hen Timeline

I thought it would be useful to have a timeline of my broody silkie, Fluffy, raising her chicks.

  • Day 1-3 - Fluffy acting broody and sleeping in the nesting box.  Gave her two fake eggs.
  • Day 4 (at night) - put Fluffy in a cardboard box in a dog kennel with two fake eggs.  She settled right in.
  • Day 7 - gave her real hatching eggs
Starting the count over from when she got her eggs
  • Day 1-19 - sat on eggs.  threw her off the nest once a day to run around and relieve herself.
  • Day 19 - stopped taking fluffy off the nest
  • Day 20 - two eggs hatched
  • Day 21 - final egg hatched
Starting count over from when the first chicks hatched
  • Day 1-3 - Fluffy still in hatching mode.  She did cluck to chicks.  I could hear the chicks, but saw no sign of them unless I lifted her up.
  • Day 3 - Fluffy clucking to the chicks encouraging them to eat mash that I put in the nest.
  • Day 4 - Fluffy took the chicks out of the nesting box to eat at the chick feeder.
  • Week 2- Fluffy took the chicks out of their pen to go play outside. Chicks have about half their wing feathers and are getting tail feathers.
  • Week 5 - chicks and Fluffy moved to box in run.  Protected from big chickens by plastic fence.
  • Week 7 - barrier removed so chicks and big chickens can mingle.  Fluffy done caring for chicks.
  • Day 52 (7 weeks 2 days) - Fluffy and chicks roosting in the coop.
  • Week 11 - one chick started to crow. Rehomed
  • Week 13 - chicks starting to bawk instead of peep.  Chicks mostly hang out on a high perch we put up in the run.  (The bigger chickens don't usually go up there.)
Other dates that might be useful:
2.5 weeks - age when chicks were using a ramp up to the brooder coop just fine.  They might have been able to do it sooner, but I didn't trust them before then.

Wednesday, April 15, 2015

Easter egger odds (chicken genetics)

A few weeks ago, I got some haching eggs to test out if my constantly broody silkie would be a good mama hen.  One of the eggs was a houdan and three of the eggs were easter eggers.  The silkie has been faithly sitting on the eggs for 18 days now (fingers crossed).  To distract myself from the waiting, I had to ask: what are the odds a chick (assuming a hen) would also lay a colored egg?  

There are several different egg color genes, the wild white color, a blue color (dominate to white), a brown egg color (which is controlled by several genes), and  a pink egg color.  A dominate gene means if that gene is present, you can't tell the other gene is there (it is not expressed).  A co-dominate gene means both genes will show (be expressed).  The blue and brown are both dominate to white, but co-dominate to each other.  If a hen has a white gene and a blue gene, she will lay blue eggs.  If a hen has a white gene and brown gene, she will lay a brown egg.  If a hen has a blue gene and a brown gene, she will lay an olive colored egg (blue and brown combined).  This is because blue is the color of the egg shell, but brown is an overlay to the egg shell.  A person can scrub the brown off an egg, but the blue eggs are blue even on the inside of the shell.

The most likely scenario is the rooster has at least one copy of the blue gene and the hen definitely has at least one copy (she laid a colored egg).  So, if each had a copy of the blue gene and a copy of the white gene, 25% of their chicks would lay white eggs and 75% would lay a colored egg.  So if there were four chicks, three would lay blue eggs and one would lay white eggs.  (Keep in mind this isn't strictly true.  If a person hatched hundreds of eggs, then these numbers would be right, but for small numbers of eggs like 3 or 4, a person could have all white eggs or all blue, who knows.)

The best case senario is that either the rooster or the hen has two blue genes.  In that case, 100% of the chicks would lay blue eggs.

Worst case is the rooster had two copies of the white gene and the hen had one copy of the white gene and one copy of the blue gene.  At that point, 50% would lay white eggs and 50% would lay blue eggs.

Now an interesting thought is what if the rooster had a copy of the brown egg gene?  If the rooster had two copies of the brown egg gene and the hen 2 copies of the blue egg gene, then all would be olive eggers.  If the rooster had one copy of the brown gene and one copy of the white gene and the hen had one copy of the blue gene and one copy of the white gene, then 25% would lay white eggs, 25% would lay blue eggs, 25% would lay brown eggs, and 25% would lay olive colored eggs.  So, 50% of the chicks would lay a cool colored egg of some kind. 

Resources:
http://sellers.kippenjungle.nl/page2.html

Saturday, March 28, 2015

Trying a broody

Fluffy, the silkie, went broody again.  This will make the third time she's been broody since October.  My curiosity got the best of me and I wanted to find out if she would hatch eggs.  I've never done this before, here's what I've done so far:

  1. Make sure she was really broody.  I've read that the hen should sleep on the nesting box for three nights in a row to prove she is broody.  Some other signs are sitting in the egg box and making a ticking noise when she's let out in the yard, then running back to her nest.  She also might pull the feathers off her chest.
  2. Prepare her space.  There is a lot of debate about whether you should move a broody.  I don't have room in my coop and she was keeping other hens out of the nesting box.  I got a 3 ft x 2 ft dog crate for her to be in and put it in the shed.  I cut a hole in a small sized moving box from Lowes and filled it with pine shavings.  The small sized box seems to be just right for a bantam broody.  I cut a little hole in the box to fit the nipple from her horizontal waterer, so she could get water. I also put some of her fermented feed in the lid from a nutella jar and sprinkle scratch on top.
  3. Move the broody.  After it was dark, I lifted her out of the nesting box and put her in the box I had prepared.  Then I put the box in the kennel in the shed.  I also put 2 wooden eggs in the box for her to sit on.  I figured the sooner I moved her the better.  That way, if she broke, she wouldn't have been sitting on real eggs.
  4. Find hatching eggs.  This was way harder than I had thought.  I wanted to time her hatch date to coincide with the days that my local farm store gets chicks, so I could see if she'd adopt a chick.  This meant I had a few days to find eggs.  But people don't return calls very quickly.  My first and second sources of eggs ended up not working out, but I found someone who was advertising on KSL classifieds near me that had some.  I only need four eggs, so I was able to get some that day.
  5. Give her the hatching eggs.  I let the eggs I got sit large side up in an egg carton overnight. I debated whether to wash them or not (some were kind of dirty), but decided not too since the bottom of a chicken isn't that clean either.  Since my kids wanted to help, I let each of them set an egg next to Fluffy (one at a time).  I'd close the door to the shed and when I opened it again, the egg would be gone, tucked safely underneath.
  6. Throw the broody off the nest once a day.  Fluffy is one of those chickens who will not get off the nest on her own.  Once I realized this, I put water and food in the nest with her.  Once a day, I take her off the nest and let her run around outside.  Before I pick her up, I carefully spread her wings a little.  She likes to keep eggs under there.  Then I pull her out of the box and set her down outside and give her a little nudge to get her to stand up.  She runs around for about 20 minutes, poops, then goes back to her eggs.  The first few days, she went back to the nesting box where the eggs had been, but now she goes back to her new nest.
  7. Wait.  This is the part I'm currently on.  I plan to candle the eggs at 8 days and maybe 14 ( to check for bad eggs).  The eggs should hatch sometime between 20-23 days.


Putting down a chicken

Holly, the hen, had been fading all winter.  Her comb turned pale.  I tried worming her.  I checked her for parasites.  I had a fecal float test done.  Nothing.

I began to suspect she had internal problems.  She was our little chick that wouldn't grow and, at 9 months old, had never laid.  Eventually she couldn't stand up.  It was time to put her out of her misery.

The method I eventually chose was to use a killing cone and a sharp knife.  A killing cone is a metal cone that restrains a chicken so that it can be killed.  Since it was Sunday and I didn't want to go to the store, I made a cone out of a cardboard box.  (One time use only).  I clamped a piece of 2x4 to a ladder to suspend the killing cone from.  I put a large garbage can with a trash bag in it under the killing cone.  I put her in.  I think she expired right then.  To make sure she was dead, I cut her veins like you would for a meat chicken.  I used a kitchen knife, but I learned it wasn't really sharp enough.  Next time I'll use a filleting knife or a box cutter.  Then I disposed of her body appropriately.

It was stressful, but I was glad she was out of her misery.

Thoughts on breeds - the current flock

I realized that I've had my chickens for almost a year now.  I thought I'd share what I thought about the breeds I have chosen.

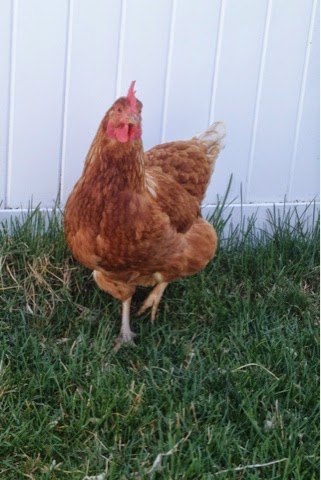
Gold Sex-link - Amazing hen.  We've gotten a medium / large brown egg from her every day (except 2) since she started to lay.  She is friendly and even tempered.


Barred Rock - Curious and bossy.  She's larger than the others.  She lays a large / extra large light tan egg.  She layed through the winter just fine.  She lays about 4 times a week.

Silkie - She lays really well for about a month, then goes broody.  She even layed in the winter.  Oddly enough, she's top hen.  She's gone broody 3 times since October.  It takes about 5 days to break her.  I just gave up on her and got her some eggs to hatch.  If she'll hatch eggs and adopt chicks, then she'll be earning her keep.

Bantam Cochin - She didn't lay the entire winter.  She's started laying again.  She went broody once, but was easy to break. She'll also sit on my lap.

I had one chicken die, she just sort of faded over the winter.  She never laid, so I think there was something wrong internally.  She was sold to us as a sex link, but I think she was actually a wellsummer.

So, do I like my hens?  Yes.  I'm happy with all of them.

As I gradually replace hens in my flock, I'd get another gold sexlink.  I wouldn't get the barred rock or the bantams again.  The barred rock is big.  The cochin bantam doesn't lay very consistently, but her eggs are adorable.  I like her, but can't decide if I'd ever get another one.  The not laying all winter put her on my naughty list.  For the silkie, the jury is still out.  She lays, but her broodiness is a little annoying.

I might be getting an easter egger to replace the chicken who died.  We'll see how that goes.